RazorPay Integration
Integrate RazorPay Payment gateway in your Web Application


Introduction
Welcome to this short blog which will explain to you how to integrate the Razorpay API into your web application in 5 simple steps.
Step 1 - Add Razorpay Script in index.html
Insert the following script inside your index.html file (in the <head>, for importing the Razorpay functionality inside your web application.
<script src="https://checkout.razorpay.com/v1/checkout.js"></script>
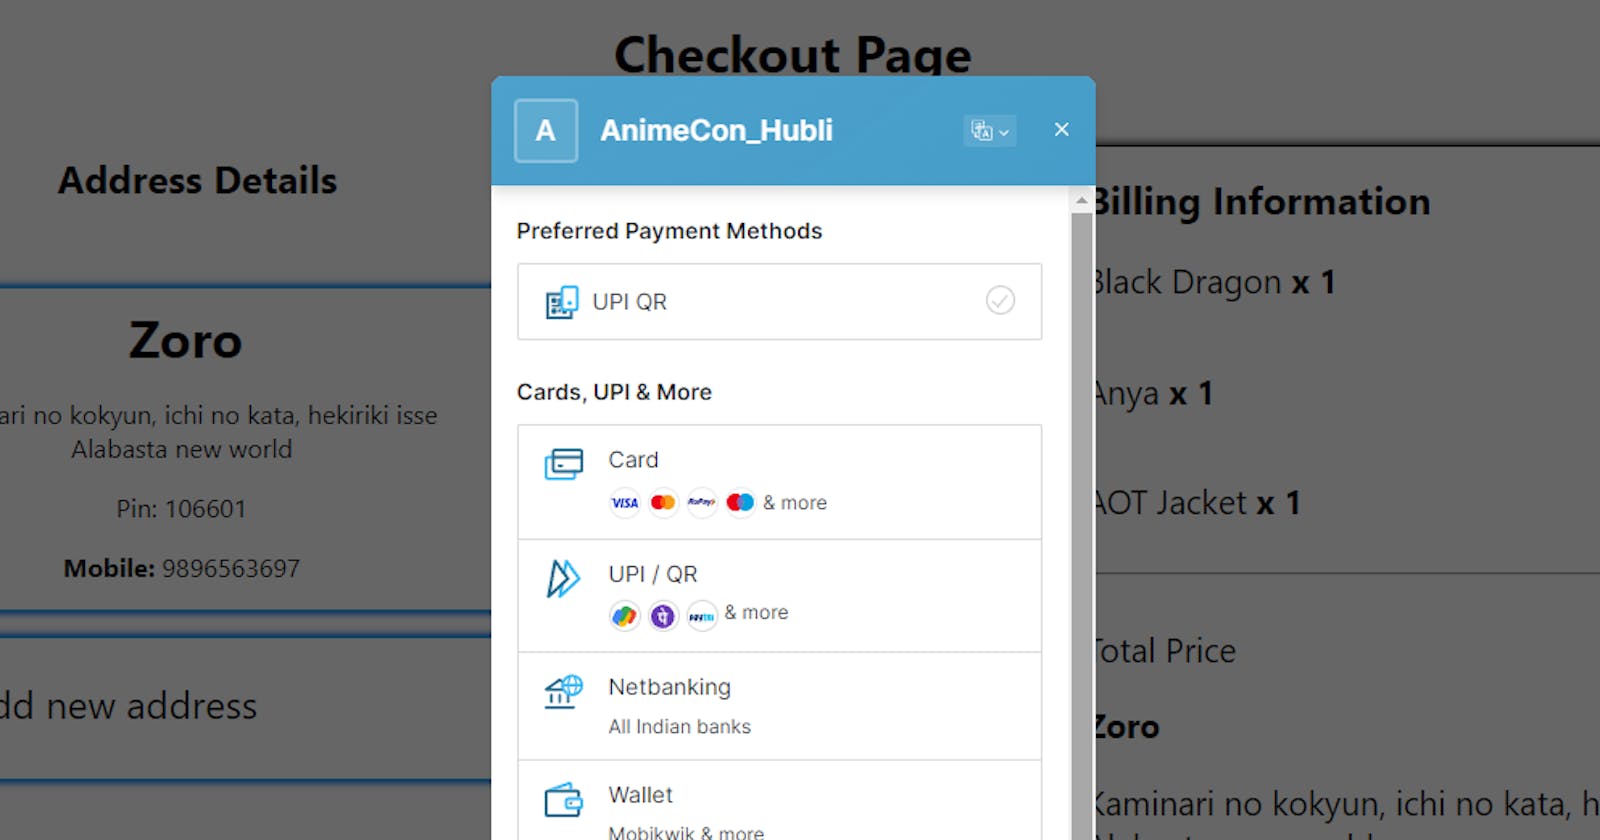
Step 2 - Call the Razorpay Component
Create an onClickHandler on your checkout page, which will display your Razorpay Component when the user clicks on the checkout button.
<button onClick={checkoutHandler}>Checkout</button>
Note: You need to include relevant checks in the handler before calling the component, i.e. checking if the user has selected an address, entered all fields etc.
Step 3 - Code Snippet for Razorpay Component
Paste the below code snippet to call the Razorpay API. This will display the Razorpay popup on your window. You can call this in the checkoutHandler itself or create a separate code for code modularity.
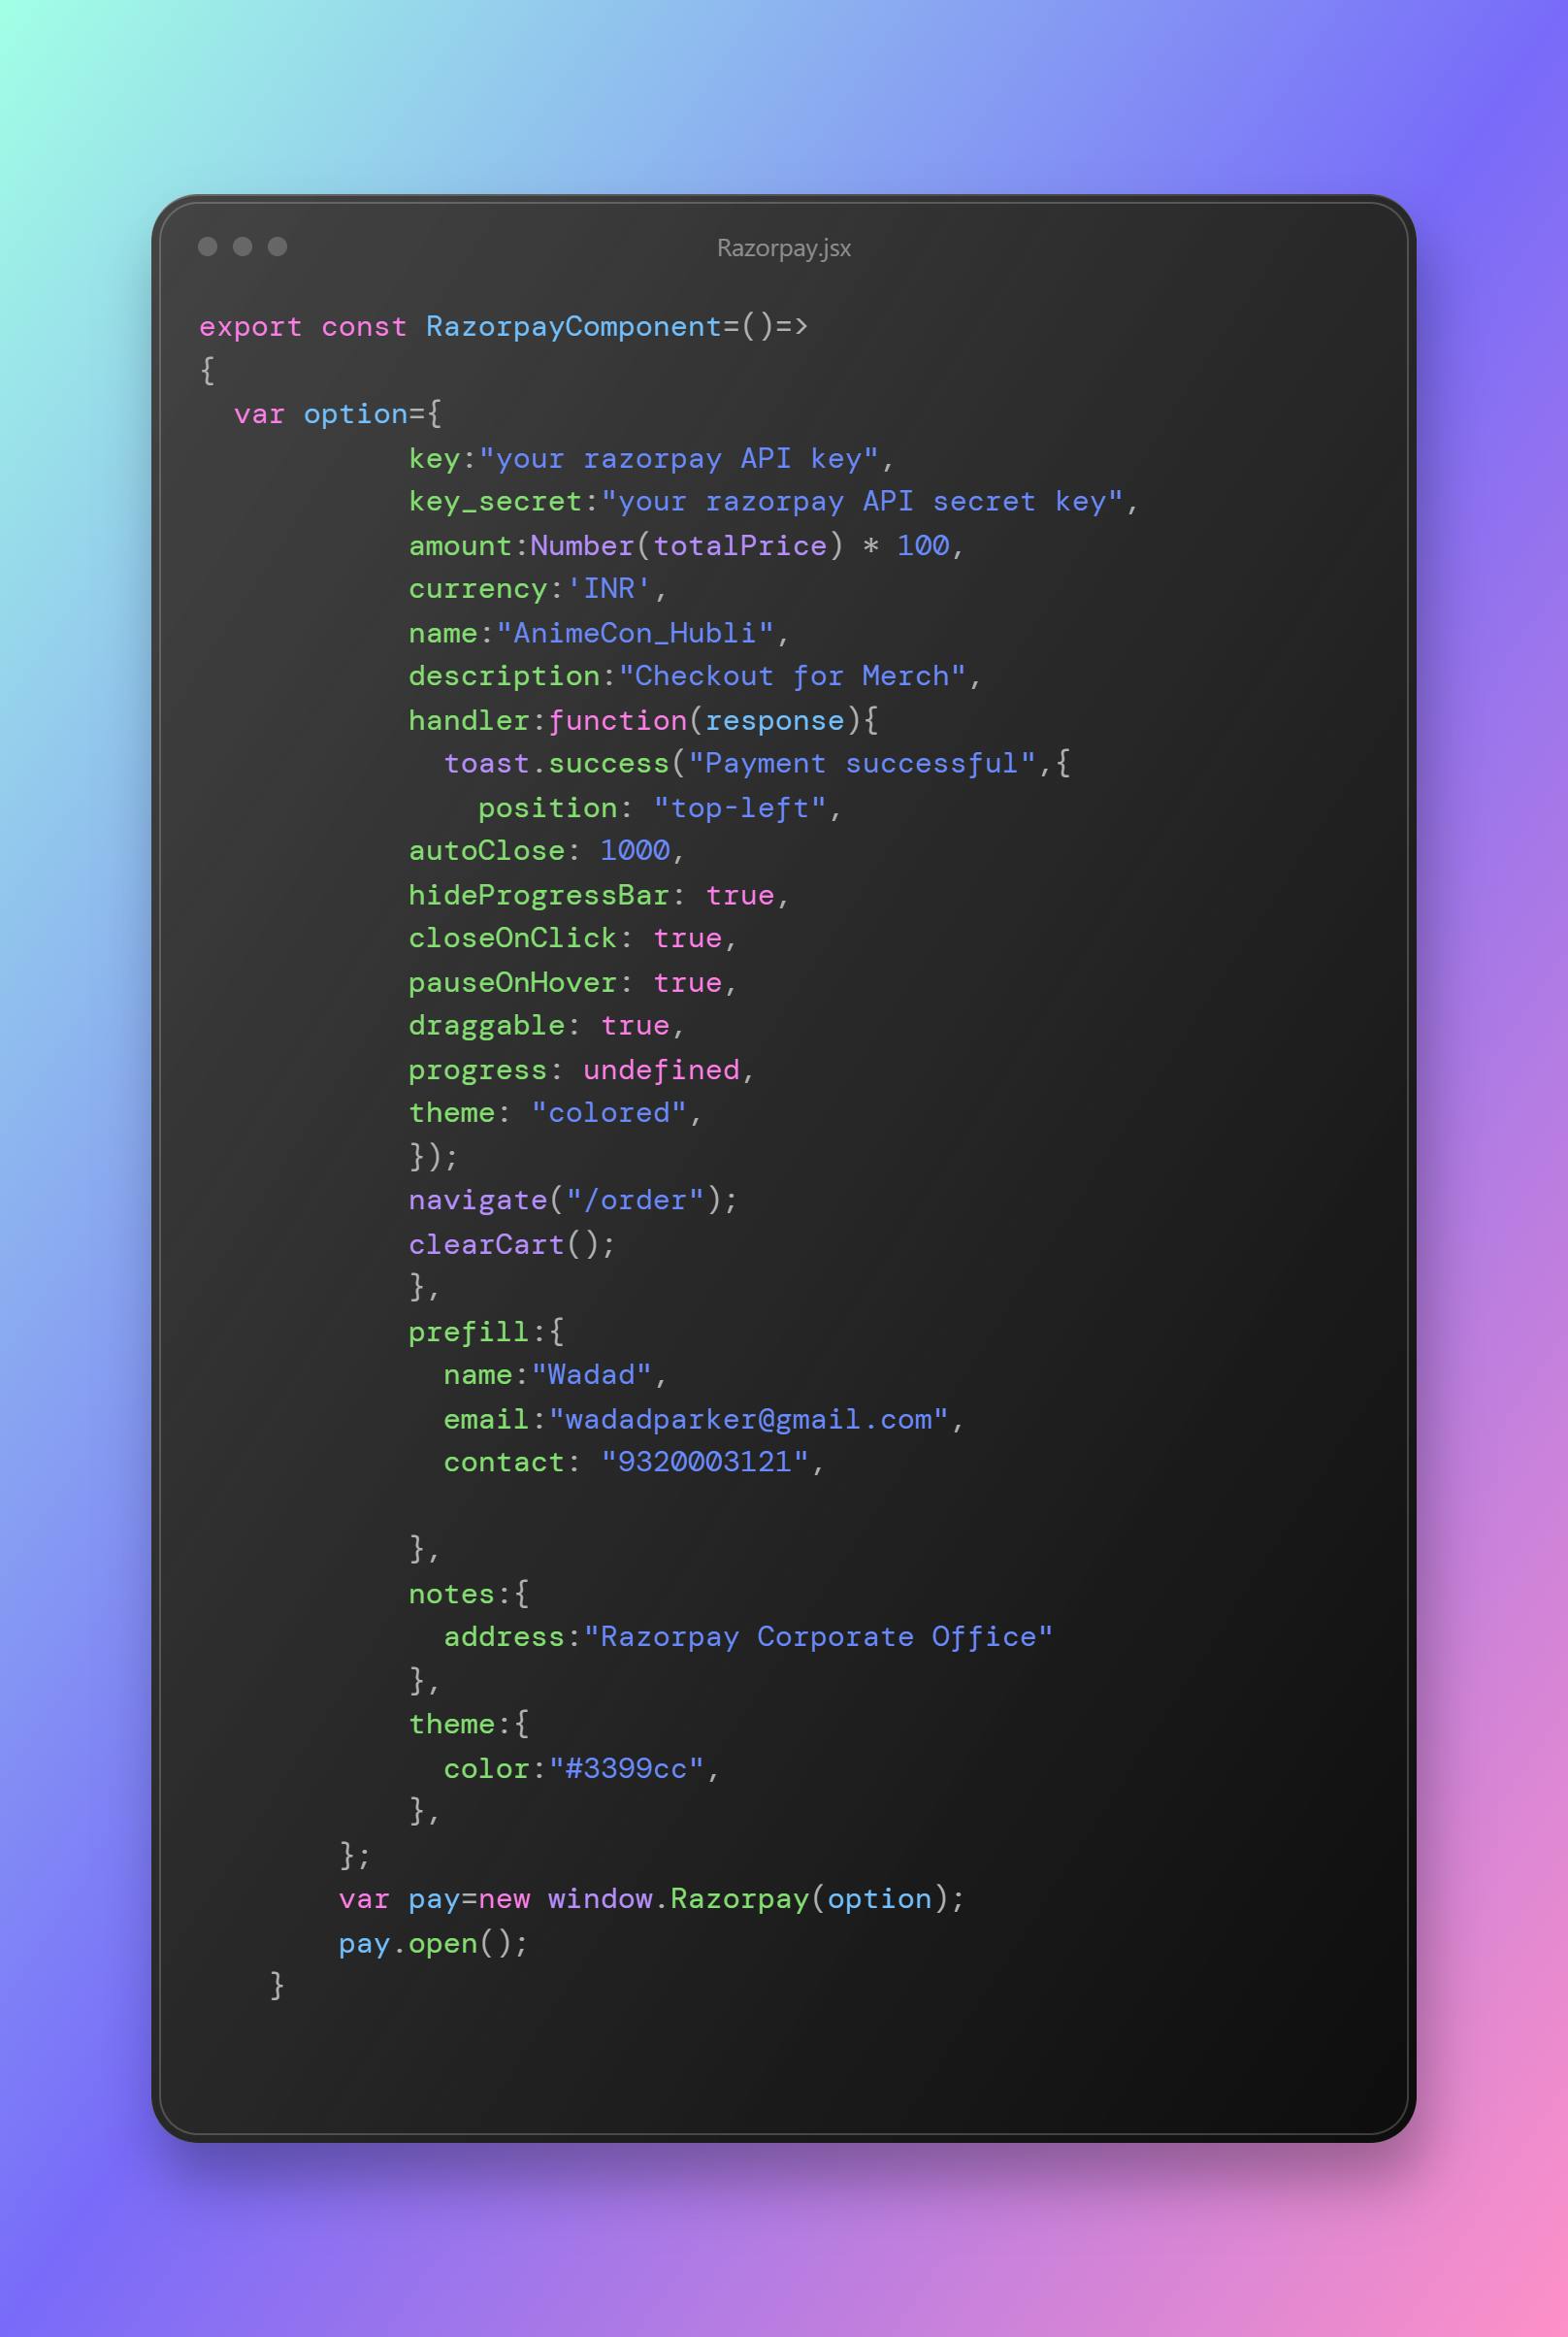
Key and Key_secret: These are the API keys that you will get from your Razorpay account. I will explain how to generate these keys in your Razorpay account in the next step.
amount: Your total price of items from your cart will be given here. Please note that the amount is calculated in terms of paise so remember to multiply by 100 when giving value into the amount field.
handler: This is the callback function that will be executed after the user has made the payment. I have given a react-toast notification here to make the user aware that payment was successful and then navigate the user to the order details page. It's up to you what you want to do after the payment is done in your web application. The Razorpay gateway will close automatically after the payment is completed.
Step 4 - Razorpay API Keys
You need to register on the Razorpay website and create your account.
Once registered, from your dashboard navigate to settings->API Keys where you will see your API Keys.
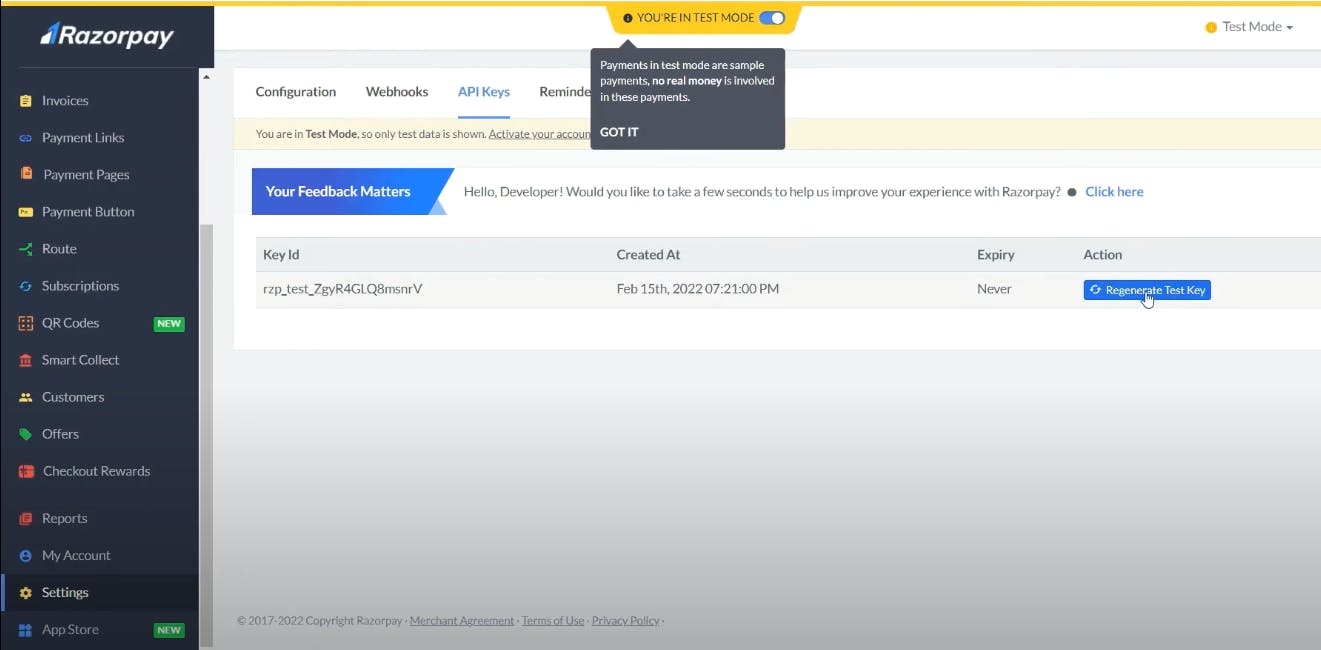
Generate new keys and you will see your key_id and key_secret which you need to copy and paste into the code snippet given in step 4.
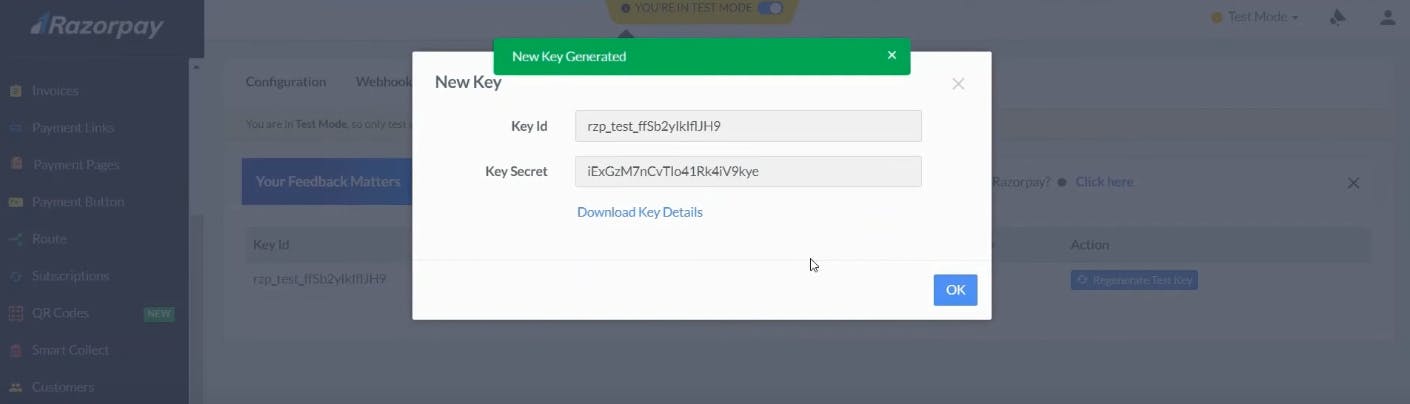
Note: Don't copy this one, it won't work 0_0
Conclusion
Congratulations, you have successfully learned to integrate Razorpay Payment in your web application ^_^ Please keep in mind that payment integration will be in test mode, to have an actual integration in live mode, you need to register with Razorpay as a business which can take 1-2 weeks to be verified.
References
Thank you for reading my blog, let's connect to explore and learn web development together ^_^